HOW TO REMOVE UNNECESSARY TEMP FILES FROM THE COMPUTER
Some times after a long long period of usage your computer may become slow because of the gathering of unnecessary temporary files. So to avoid this, what you have to do is, at least once in a weak you have to remove the unnecessary files from your computer. It is very simple.......
Follow these steps
1. Start > Run > (don't type commas) "temp" > OK
(Now all the files in the temp directory will be displayed. You can select all and delete all permanently.)
2. Start > Run > (don't type commas) " %temp% " > OK
(Now all the files in this directory will be displayed. You can select all and delete all permanently.)
3. Start > Run > (don't type commas) "cookies" > OK
(Now all the files in this directory will be displayed. You can select all and delete all permanently.)
4. Start > Run > (don't type commas) "prefetch" > OK
(Now all the files in this directory will be displayed. You can select all and delete all permanently.)
Deleting all these files will speed up your system little bit. Also you have to do Disk defragment once in a month (at least once in two months), which will rearrange your files and folders in a drive. For defragment....
Open My computer > Select any drive > Right clik > Properties > select the tab TOOLS > Defragment now
[Feel free to ask , if you have any doubts regarding this blog]
*************************************
Thursday 30 May 2013
HOW TO CONFIGURE GMAIL IN MICROSOFT OUTLOOK 2010
HOW TO CONFIGURE GMAIL IN MICROSOFT OUTLOOK 2010
Configuring gmail in Microsft outlook 2010 is more simple than that in Outlook 2007. what you have to do is, just open your gmail id and click on the setup button and go to setup.Then the setup page will appear . In the setup page you have go to the "Forwading and POP/IMAP" tab. In this tab you can see the POP Download and IMAP access options. In the POP Download section you have to enable it by selecting the first or second option. and in the IMAP access section, click on IMAP enable button.and save changes

Now open the Microsoft outlook 2010. A page will come and will ask you whether you want to create a new account or not. Just give a click on YES. Then an outlook 2010 start up page will come. Just click on NEXT


Now you will be asked the email details for which you are configuring. Just type the details and click on NEXT


Now Microsoft outlook 2010 will open and will send and receive mails....................
(Feel free to ask if you have any doubts regarding this post, Thank you.....)
***********************************
Tuesday 28 May 2013
HOW TO DOWN LOAD YOUTUBE VIDEOS AND OTHER STREAMING VIDEOS
HOW TO DOWN LOAD YOUTUBE VIDEOS AND OTHER STREAMING VIDEOS
Normally youtube and other streaming video sites (especially pornographic sites) will not allow users to download their videos. (for downloading the site will ask membership login, and for membership we have to pay them ). But using some third party software, we can down load these vidoes, without any membership..
Method 1
For downloading youtube videos, you have to install a third party software called youtube down loader. Just down load the software and install it in to your computer.
for downloading "youtube downloader", copy the URL address down and paste it into your web browsers address bar
http://download.cnet.com/Free-YouTube-Downloader/3001-2071_4-75219434.html?spi=864d246ef8f845dc8af1b21247f097b4
first of all you have to select which video from youtube , you have to download, . then play the video and at the time of playing copy the URL address of the video, and
Open the "youtube downloader" software . in the software , there will be a space foe pasting the URL address of the video ,you want to download. In that place paste the URL address you have copied from youtube, and click on DOWNLOAD button, Now the video will be down loaded to the default location.
Method 2
If the youtube downloader software is not working, another method is there by using a software called "FREECORDER". you have to down load FREECORDER 5 from internet, and install into your system.
Before installing you have to change the browser you are using into the default browser. otherwise the freecorder toolbar will be installed defaultely into INTERNET EXPLORER. Even then no problem. you can down load videos.
After the installation of FREECORDER 5, just open the browser and play the tube video. while paying the video, a copy of the video will be captured and will be saved inside the software.
for saving the video in our folder , you have to go to
C:\Program Files\Freecorder
and open the FCVideo application file.In that window you can see the saved videos. you can select the video by giving a single click and can save to the default location. from there you can play the video...
(Try to user Freecorder 5 only, other version may not work properly..)
(Feel free to ask if you have any doubts related to this post.......)
*******************************
Tuesday 21 May 2013
HOW TO BLOCK / UNBLOCK FACEBOOK FROM YOUR COMPUTER
HOW TO BLOCK / UNBLOCK FACEBOOK FROM YOUR COMPUTER
You can block the access of some particular websites from your pc by using some simple methods. Consider that you have to block FACEBOOK from your PC. For this follow these steps….
Start > Run > (type) system32 > ok
Now you will enter inside system32 window. Now select the folder named “drivers”. Open it and you can see another folder named “etc”. Double click and open it. Now you can see a file named “hosts”.Double click and try to open it. Now you can see an open with window. In the open with window select the notepad and click on OK button.
Now you can see the contents of the hosts file in a notepad. In the last part of the notepad ,you can see as
127.0.0.1 local host.
In the next line type as
127.0.0.2 www.facebook.com
if you want to block youtube also, you can write in the next line as …
127.0.0.3 www.youtube.com
You can block sites in this manner, …….
Now save all these changes you made in this note pad. And close it. Now try to enter into facebook from your pc in any browser, you cant……
Also by deleting this and saving the changes will unblock the facebook blocking......
(One more thing is there, while trying to save the changes made in notepad window of the hosts file, instead of saving if it is asking save as, it means that you have not enough rights to change the notepad content. Then you have to change the security setting of the hosts file and have to try again…)
Feel free to ask any doubts if u have related to this post.........
RELATED POST : FACEBOOK BLOCKING AND UNBLOCKING
Protecting the Operating System.....
After the installation of an operating system (normally called OS) (windows XP/
Windows 7), we have to do some changes in the setting of the operating system
to protect the OS from Virus and Malware (only up to a limit…).
We all know that the VIRUS is a program and are almost all viruses are autorun . When we are installing a program or open a program or web page, virus are automatically installing to our PC and corrupting our OS and other files.first of all what we have to do is disable the AUTORUN facility of the Windows OS.
How to disable AUTORUN.......Simple, just follow these steps
If your OS is windows XP, then
Start > Run > (type only the word) "gpedit.msc" > OK
Then a group policy editing page will come.In the left side of that window there will be two sections as "Computer Configuration " and " User Configuration"
First , click on + symbol of the Computer configuration, then its sub groups will come. In that select the administrative templates. Then in the right side of the windows its groups will come.In the right side there will be a folder named Windows. Just double click and open that folder. Then you will get the settings of the windows folder. In that settings,you can see a setting as "Turn off auto play" and it will be as not configured. Just double click on that setting , you will get a setting changing window. In that window change the setting as enabled ( by selecting the dot ). Just below that there will be an option that "turn off auto play on , in that box , select All Drives. Then Apply and OK.
Now auto play function is disabled in your Windows XP (Now even if you are inserting a CD with Autoplay function, it will not play automatically. So you have to play it manually.)
If your OS is Windows 7 , then
Start > Run > ( Type only the word, no inverted commas) "gpedit.msc" >OK
Start > Run > ( Type only the word, no inverted commas) "gpedit.msc" >OK
Then a group policy editing page will come.In the left side of that window there will be two sections as "Computer Configuration " and " User Configuration"
First , click on + symbol of the Computer configuration, then its sub groups will come. In that select the administrative templates.
Select "All settings" . in this option , comes down , you can see a setting as Turn off autoplay , double click on it and enable it . In the downside box select All Drives. Then click on APPLY ,and OK
Next to turnoff auto play setting, there is one more setting as Turn off auto play for non volume devices .Double click on the seeting and enable this setting like the previous one.
Now come back from computer configuration and come to User configuration. In user configuration go to administrative templates > all settings. Here also turn off auto play and Turn off Autoplay for non-volume devices.
Now you can close the Group policy editor page.
{After registry editing you can install an Antivirus software in your system more safety}
-
-
-
-
-
Feel free ao ask any doubts if u have................thanku u..
Start > Run > ( Type only the word, no inverted commas) "gpedit.msc" >OK
Then a group policy editing page will come.In the left side of that window there will be two sections as "Computer Configuration " and " User Configuration"
First , click on + symbol of the Computer configuration, then its sub groups will come. In that select the administrative templates.
Select "All settings" . in this option , comes down , you can see a setting as Turn off autoplay , double click on it and enable it . In the downside box select All Drives
Select "All settings" . in this option , comes down , you can see a setting as Turn off autoplay , double click on it and enable it . In the downside box select All Drives
Start > Run > ( Type only the word, no inverted commas) "gpedit.msc" >OK
Then a group policy editing page will come.In the left side of that window there will be two sections as "Computer Configuration " and " User Configuration"
First , click on + symbol of the Computer configuration, then its sub groups will come. In that select the administrative templates.
Select "All settings" . in this option , comes down , you can see a setting as Turn off autoplay , double click on it and enable it . In the downside box select All Drives. Then click on APPLY ,and OK
Next to turnoff auto play setting, there is one more setting as Turn off auto play for non volume devices .Double click on the seeting and enable this setting like the previous one.
Now come back from computer configuration and come to User configuration. In user configuration go to administrative templates > all settings. Here also turn off auto play and Turn off Autoplay for non-volume devices.
Now you can close the Group policy editor page.
{After registry editing you can install an Antivirus software in your system more safety}
-
-
-
-
-
Feel free ao ask any doubts if u have................thanku u..
Saturday 11 May 2013
WINDOWS 7 INSTALLATION STEPS
Like windows XP, for the installation of Windows 7, we need a bootable Windows 7 installation CD.The installation process is same as Windows XP. First of all change the first booting option into CD drive.For changing the Booting option -


*** THANK YOU ***
- Restart the system, and press DEL / F2 continuously (depending the motherboard). Then u will enter inside the SETUP Page. Select the BOOT tab by pressing the right arrow. Change the first booting option into CD drive by entering. (there may be little bit change as the motherboard manufaturer changes)
- Save the changes and exit. (before restarting insert the Windows 7 installation CD in the CD Drive).
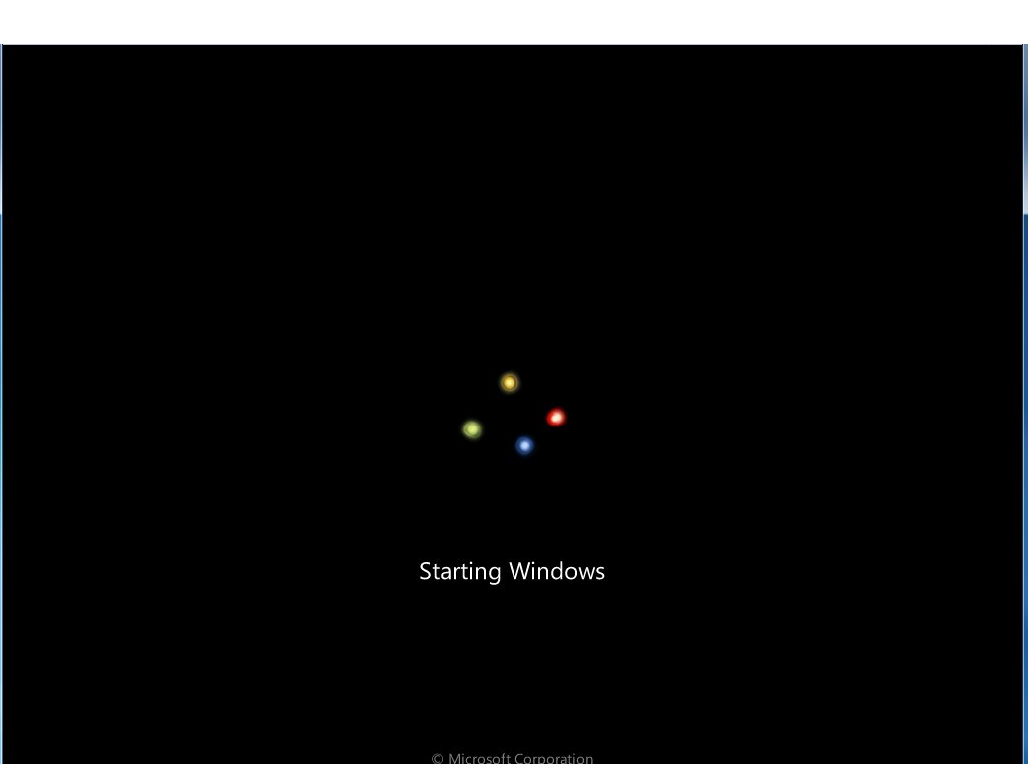
- The system will restart and u have to press any key before 5 dots will come on the screen. ( If u miss the dots , don't worry, just restart the system and do the same.
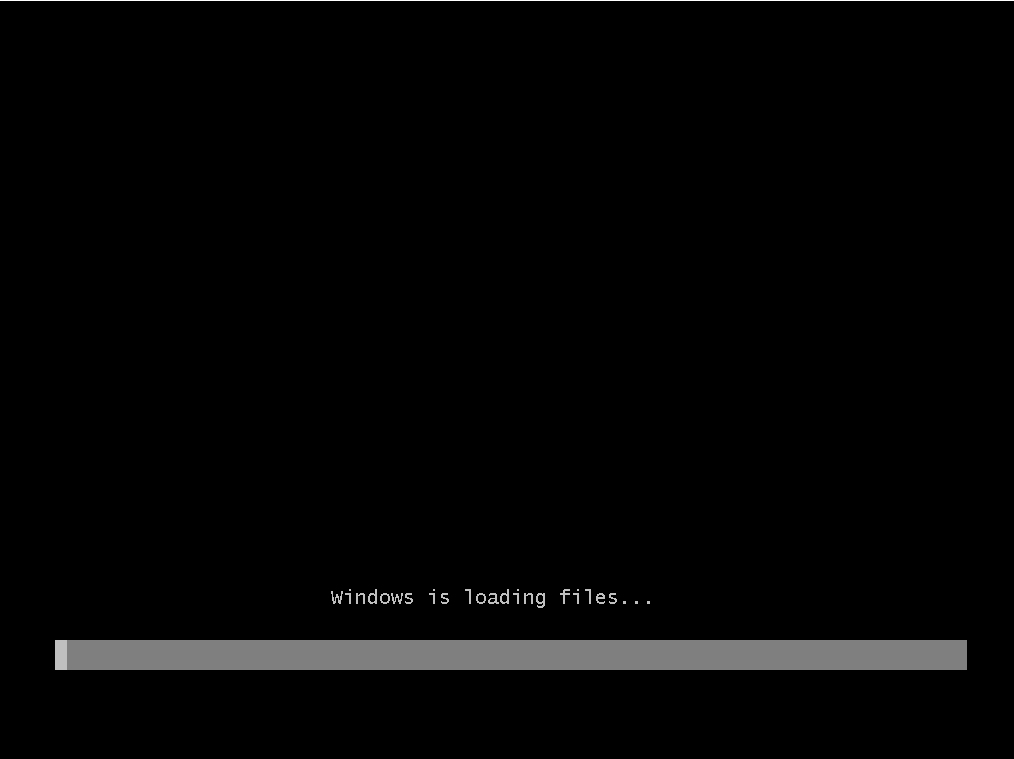
- Now the system files will be copied to the hard disk automatically
- After completing the installation of files, windows installation page will come.Select the language as English,and keyboard as USand press NEXT
- In the next window just click on INSTALL NOW
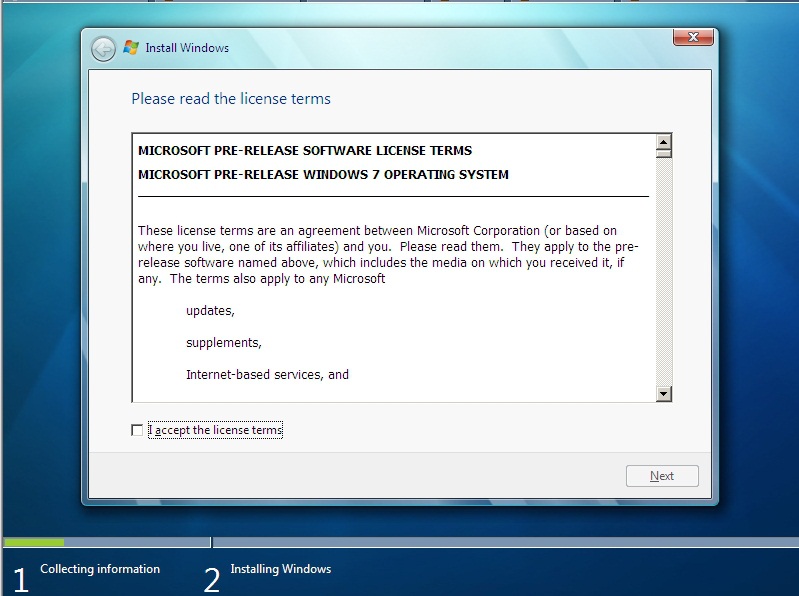
- In the next window License conditions will show u and just give a tick mark in the agreement box and click NEXT
- In the next window just select the CUSTOM option
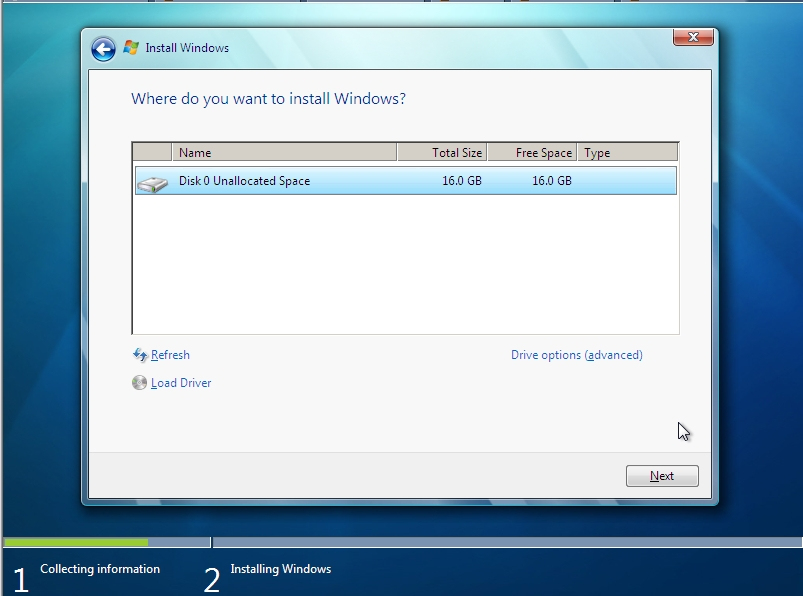
- Now a window will come and show u the current disk size and partitions. U just select each drive shown and click on DRIVE OPTIONS. and delete each partition and create new partition and format. then select the first partition (ie C drive)and click on NEXT
- Now the installation will start and it will take some time to complete
- The system will restart auomatically
- After completing registry updation and everything (will do automatically) windows will complete the installation process and will restart again and the setup will configure your computer for the fist use.and the computer will ask a username .Just type a username and click NEXT.
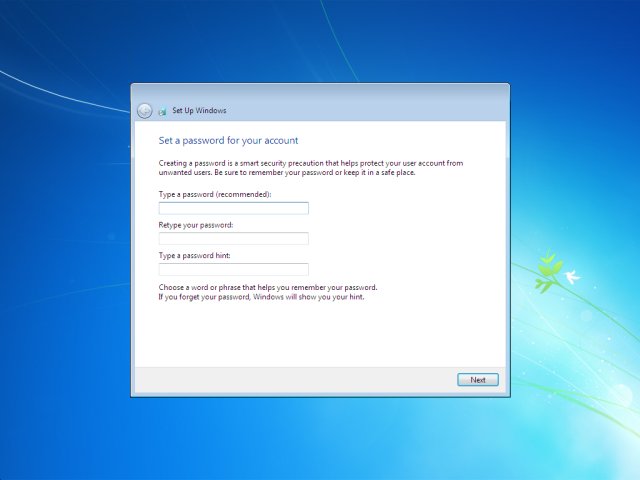
- In this step windows will ask for entering a password. You can enter a new password here. (But don't forget it). Better Leave the password column as blank click on NEXT. (Password is not a must)
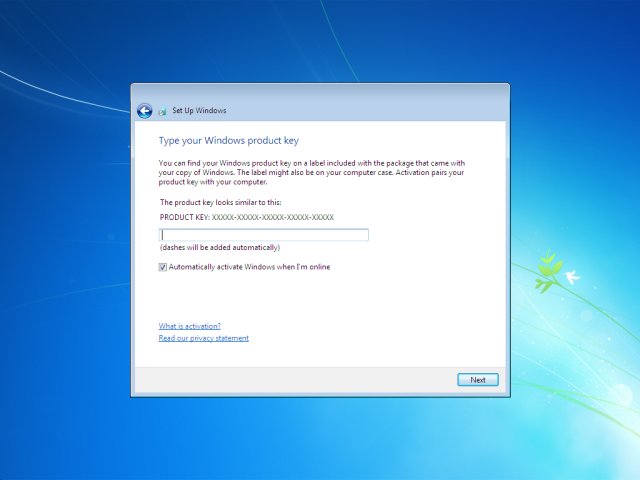
- Here windows will ask the product Key. IF you are installing with the genuine windows 8 CD, You can enter the Product key here and give a tick mark on the automatic activation on the down side. and click on NEXT. (If you are using a pirated version of windows 8 CD, leave the product key column as blank and don't give the tick mark in the bottom of the automatic activation check box,and click on NEXT)
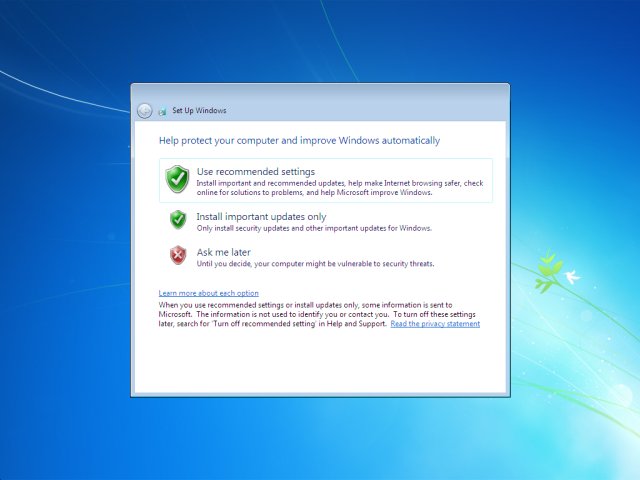
- In this session windows will ask you about updates. For genuine windows users can select the first option ie: The recommended settings. and for the Pirated CD users can select the last option, ie: "ask me later" . Then click on NEXT
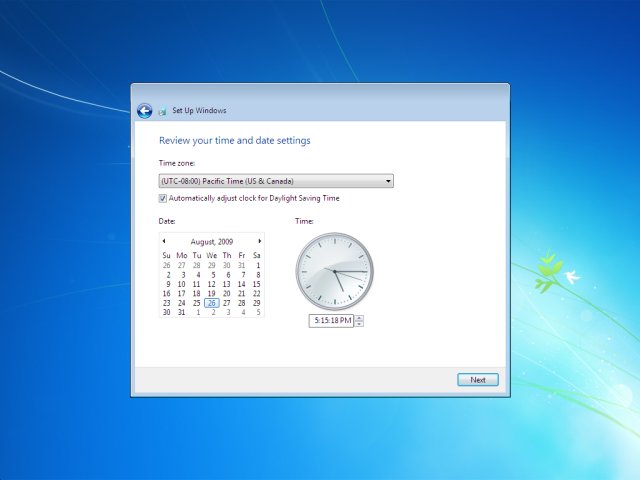
- This is the time zone where windows will ask you which is your time zone.Select your time zone, Date and time and click on NEXT.
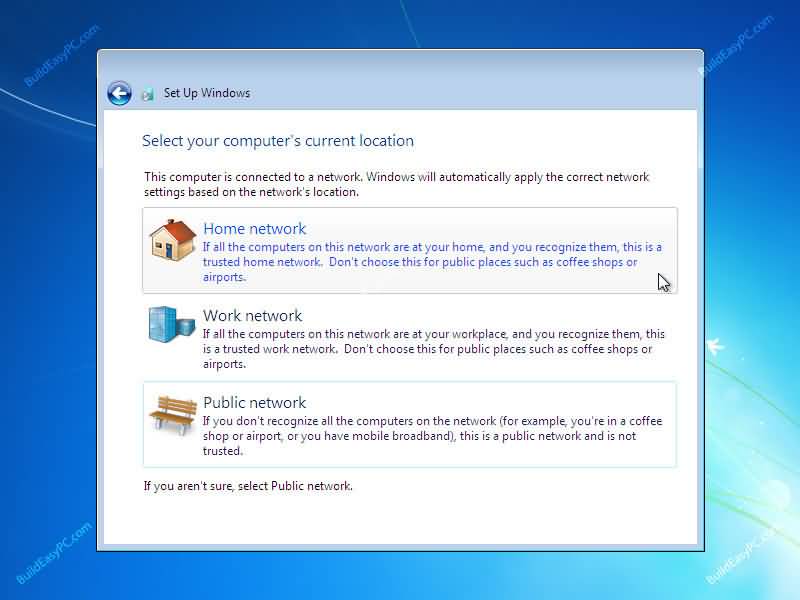
- In this step windows will ask you the type of network in which the computer is going to connect.Select 2nd or 3rd option and click on NEXT.
- After this windows will finalize the installation steps.

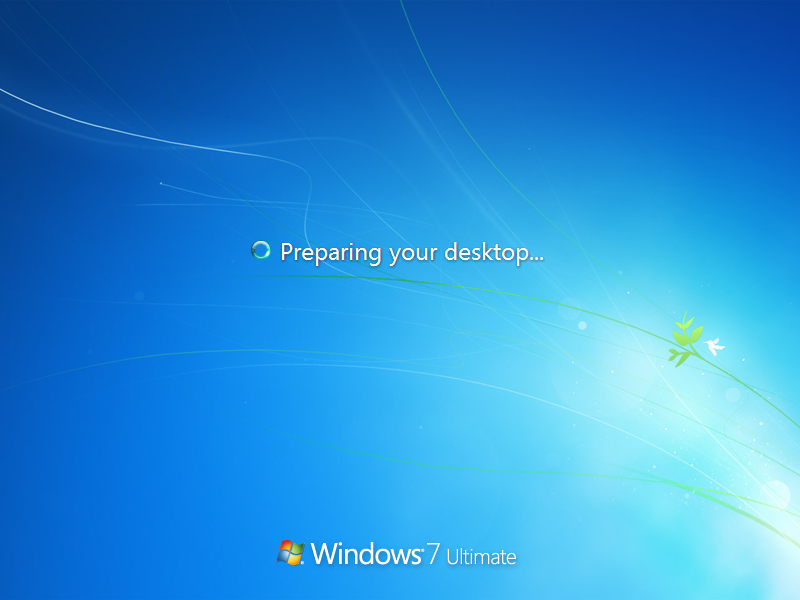
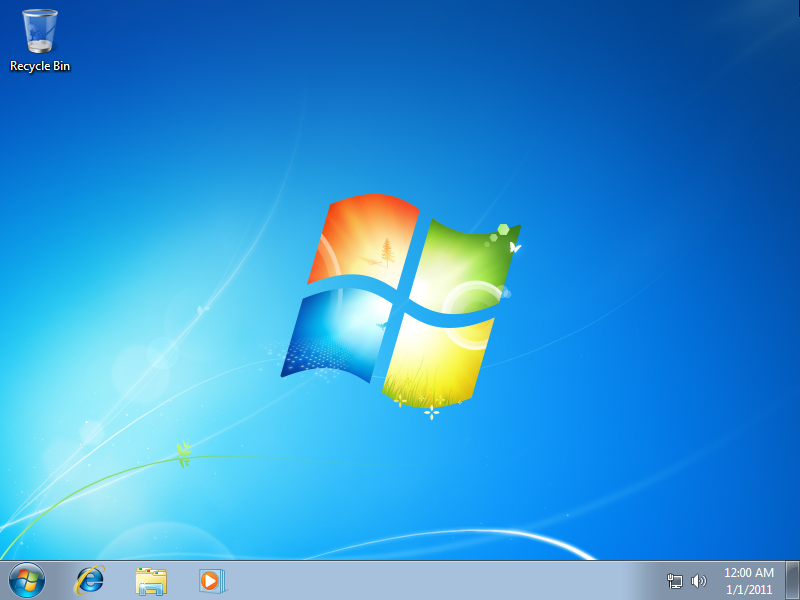
- After finalization of windows installation, the system will reboot and will load Windows 7 desktop
- Now you can use the New Windows 7 OS.
*** THANK YOU ***
Subscribe to:
Posts (Atom)